
Integrating a Visonic alarm into HomeAssistant using a Wemos D1 mini (ESP8266)
25 September 2025Our home has a Visonic alarm system with window, door, and motion sensors. The system comes with an official app that communicates via some server. I don't like depending on external services, in particular if that service has control over my alarm system [1]. What I do like is Home Assistant, and as luck would have it I stumbled across davesmeghead/visonic, which promised to do exactly what I wanted. Despite the great documentation on their wiki, I had a few hiccups setting everything up, in particular because my system came with a powerlink module already installed, a case that the wiki didn't cover at the time.
Using a Wemos D1 mini
In order to communicate with the alarm panel we need to install some hardware into the panel. The example on the wiki I followed uses a Wemos D1 R2 (ESP8266). I didn't have one of those, but I did have some Wemos D1 minis lying around. The R2 also requires splicing off the 12V power supply from the panel, which I didn't feel like doing. Luckily, the D1 mini requires less power and can instead use the 3.75V power supply from the PC/IP connector (this is normally connected to the official powerlink module which we are planning to replace).
Installing ESPHome
First we need to install ESPHome onto the D1 mini. I used the following script
and installed it with esphome run visonic.yaml.
esphome:
  name: visonicinterface

esp8266:
  board: d1_mini

wifi:
  ssid: SSID
  password: SSID_PWD
  reboot_timeout: 1800s
  power_save_mode: none
  manual_ip:
    static_ip: IP
    gateway: GATEWAY
    subnet: SUBNET

# Load external components for ESPHome
external_components:
  - source: github://oxan/esphome-stream-server

# Disable hardware logging, these pins are used for the UART bus
logger:
  level: DEBUG
  baud_rate: 0

uart:
  id: uart_bus
  baud_rate: 9600
  tx_pin: 1
  rx_pin: 3
  stop_bits: 1
  data_bits: 8
  parity: NONE

# Define the port on which the controller publishes the serial data on the local network.
stream_server:
   uart_id: uart_bus
   port: 10077
Removing the existing powerlink module
Since our alarm panel already had and official powerlink module installed, I had to remove this first by following the steps below. Otherwise auto-enrolling the D1 mini wouldn't work.
- Unplug the module from the PC/IP connection. This should result in the
panel reporting
PLNK COMM LOST. - Now unplug the battery and turn of the alarm system. Then plug the battery back in and turn the alarm system back on.
- After restarting, the panel should say
SYNC WITH DEV. Depending on how many devices you have, this might take a couple of minutes. - Once this is done, go through the trouble information of the panel
until you reach
PLNK REMOVED CONFIRM?and press OK. The message should now dissappear.
Installing the D1 mini
Now everything was ready to wire the Wemos D1 mini into the panel. Initially, I used a breadboard to connect all the wires, but the wires kept moving around, loosing the connection. I recommend soldering the wires or male/female pin headers onto the D1 mini first. I connected the D1 mini as shown in the diagram below:

Figure 1: Wiring schematic for the D1 mini and a Visonic Alarm Panel. Image of the D1 mini from Fritzing.
Initially, I connected the 3.75V pin from the panel to the 3.3V pin on the D1 mini. I had it running like this for months without any issues. However, the D1 mini's specification gives an operating voltage of 2.58V to 3.6V, so this is not recommended and may damage the chip. I then read here that the D1 mini's voltage regulator (ME6211), that sits on the 5V connection, still works with lower voltages than the spec suggests. To be on the safe side, I switched to using the 5V pin instead and have not noticed any differences in operation since making this change.
Finally, it was time to add the integration into Home Assistant and connect it
to the D1 mini by selecting "Ethernet" as the connection type and input the
IP address and port as defined in our visonic.yaml. However, I had
to make sure to close up the panel first and clear any tamper messages by
entering and exiting installer mode. Without doing this the integration just
kept reporting that "no data was downloaded" when trying to connect to the
panel.
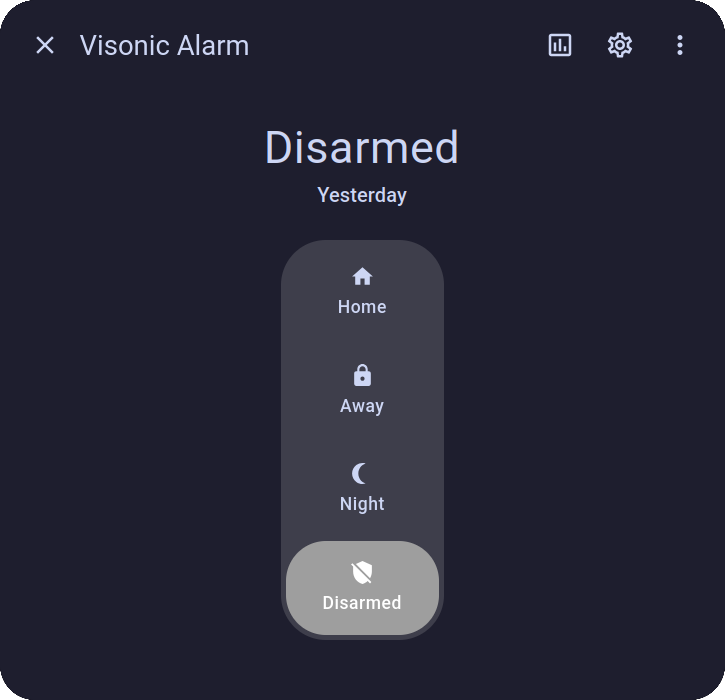
Figure 2: The Visonic integration in HomeAssistant.
Troubleshooting
At some point the panel suddenly stopped working in Home Assistant. It turned out that the ESP briefly lost connection to the WiFi. When this happens, all that's needed to get it running again is to reload the integration from within Home Assistant. This can probably be automated if it happens too often.
I also noticed that after the disconnect, I could no longer arm/disarm the alarm without entering in the code each time. Normally, the integration should retrieve the code from the panel automatically in "Powerlink mode", which it did when I first set it up. I worked around this by manually entering the code in the settings of the "Visonic Alarm" device in Home Assistant.